
Fertilization
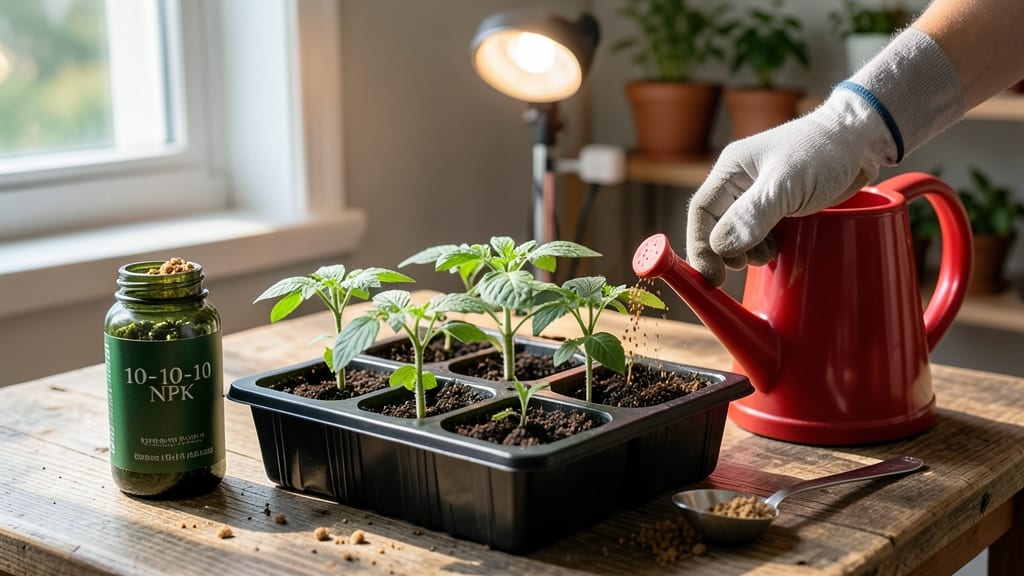
You should fertilize seedlings only after they’ve developed their first true leaves, not before—this timing prevents root burn and sets them up for steady growth.
New seedlings are fragile but full of potential—fertilizing too early or too late can stunt their growth or even kill them. Timing is everything, and knowing the right stages to feed your seedlings ensures they develop into strong, healthy plants ready for transplanting.
Most gardeners skip fertilizer entirely until the seedlings are at least 2-3 weeks old and have two sets of true leaves. Too soon, and the nutrients overwhelm their tiny root systems; too late, and they miss out on the boost they need before hardening off.
In this guide, I’ll walk you through the three critical stages to fertilize, the best types of fertilizer to use, and how to spot the signs of over- or under-feeding—so your seedlings thrive from the start.
The 3 critical stages to fertilize seedlings (and when to avoid it)
Fertilizing seedlings at the wrong time can be as harmful as not fertilizing at all. Young plants have delicate root systems that are still developing, and too much fertilizer too soon can cause root burn or even kill them before they get a chance to thrive.
The key is understanding when your seedlings are ready to receive nutrients—and when they absolutely need to avoid them.
Most gardeners make the mistake of fertilizing as soon as seeds sprout, but this is often a recipe for disaster. Seedlings don’t need extra nutrients until they’ve developed enough roots and leaves to handle the input.
Instead, focus on providing the right conditions—consistent moisture, proper light, and gentle care—until they reach the right stage for fertilization.
Here’s what you need to know about the three critical stages for fertilizing seedlings, plus the red flags that tell you to skip it entirely.
Skip fertilizer entirely. Seeds need moisture and warmth to break dormancy, not extra nutrients.
First feeding! Use a diluted liquid fertilizer (half-strength) or a gentle organic option like fish emulsion.
Final boost! Apply a balanced fertilizer (e.g., 5-5-5) to strengthen roots before outdoor exposure.
At the pre-germination stage, your seeds are focused on breaking dormancy and sending down a tiny root. This is not the time to introduce fertilizer—it can disrupt the natural process and even prevent germination.
Instead, ensure your soil is moist but not soggy and maintain a consistent temperature (around 70°F for most vegetables). If you’re using sterile seed-starting mix, it likely contains no nutrients, so hold off until you see those first true leaves appear.
Once your seedlings reach the true-leaf stage—typically after they’ve developed their second or third set of leaves—they’re ready for their first taste of fertilizer. This is when their roots have expanded enough to handle a gentle nutrient boost.
Use a water-soluble fertilizer diluted to half-strength or a low-concentration organic fertilizer like compost tea. Avoid granular fertilizers at this stage, as they can burn tender roots if not watered in properly. Think of this as a light snack to encourage leafy growth without overwhelming the plant.
If your seedlings show signs of stress after fertilization—such as yellowing leaves, crispy edges, or stunted growth—flush the soil immediately by watering thoroughly with plain water.
This helps dilute any excess salts or nutrients that may be causing harm. Over-fertilizing at this stage is a common mistake, so when in doubt, less is more.
The hardening-off stage is the final critical window for fertilization, typically occurring 1-2 weeks before transplanting outdoors. During this time, seedlings are acclimating to outdoor conditions like wind, sunlight, and temperature fluctuations.
A balanced fertilizer (like a 5-5-5 or 10-10-10) applied at this stage can give them the extra strength they need to thrive after being moved to the garden. However, avoid heavy-handed applications—stick to a light feeding to prevent shock.
There are also clear warning signs that tell you to skip fertilizing entirely. If your seedlings are leggy (long, weak stems), wilting, or showing signs of pests or disease, hold off on fertilizer.
These issues often stem from poor light, overcrowding, or environmental stress, not a lack of nutrients. Address the root cause first—whether it’s moving them to a sunnier spot or thinning them out—before considering fertilizer.
Finally, remember that seasonal timing matters. In early spring or late fall, when growth is slower due to cooler temperatures, seedlings may not need fertilizer at all. Pay attention to your local climate and the specific needs of your plants.
For example, cool-season crops like lettuce or peas grow best with minimal fertilizer, while warm-season crops like tomatoes or peppers benefit from a more consistent feeding schedule once they’re established.
By mastering these three stages and knowing when to avoid fertilizer, you’ll set your seedlings up for success. The goal is to nurture strong, resilient plants that can handle transplanting and grow into the healthy, productive garden stars you’re dreaming of. 🌱
Best fertilizers for seedlings: types, ratios, and application tips
Choosing the right fertilizer for seedlings is just as important as timing. Seedlings need gentle, nutrient-rich food to develop strong roots and foliage without burning delicate systems. The two main types—liquid fertilizers and granular fertilizers—each have unique benefits for young plants.
For seedlings, I always recommend a low-nitrogen ratio like 5-5-5 or 3-4-6 to avoid overstimulating top growth while supporting root development. Organic options like fish emulsion or compost tea are excellent for gentle nutrition, while synthetic fertilizers offer precise nutrient control when diluted properly.
Liquid fertilizers are my go-to for seedlings because they dissolve instantly, providing immediate nutrients. A half-strength solution (e.g., ½ teaspoon per gallon) is safest for young plants. Granular fertilizers, on the other hand, release nutrients slowly, making them ideal for pre-planting soil mixes but less convenient for frequent feeding.
| Fertilizer Type | Best NPK Ratio | Application Method | Best For |
|---|---|---|---|
| Liquid (Fish Emulsion) | 3-4-6 | Dilute ½ tsp/gal | Weekly foliar feed |
| Granular (Slow Release) | 5-5-5 | ½ tsp per pot | Pre-planting soil mix |
| Organic (Compost Tea) | 2-3-2 | Soak roots 10 mins | Stress recovery |
| Synthetic (Water-Soluble) | 5-10-10 | ¼ tsp/gal | Fast nutrient boost |
When applying liquid fertilizer, always water seedlings first to prevent root burn. For granular options, lightly mix into the top inch of soil and water thoroughly. I avoid fertilizing seedlings during their first true-leaf stage (about 2-3 weeks after germination) to let them establish roots naturally.
For organic gardeners, worm castings or seaweed extract are excellent choices—they improve soil structure while providing gentle nutrients. Synthetic options like 10-10-10 are best for quick results but require careful dilution. Always follow the label instructions and reduce concentrations by half for seedlings.
Remember, less is more with seedlings. Over-fertilizing can cause nutrient burn, yellowing leaves, or even death. Start with a quarter-strength solution and monitor your seedlings' response closely. Adjust based on their growth and color—healthy seedlings should have vibrant green leaves and sturdy stems.